|This post contains Affiliate Links which means I get credit when you shop through my page! Thank you for all your support!|
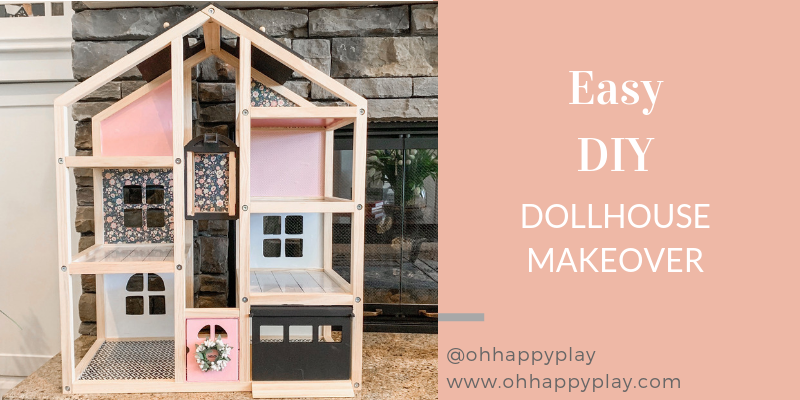
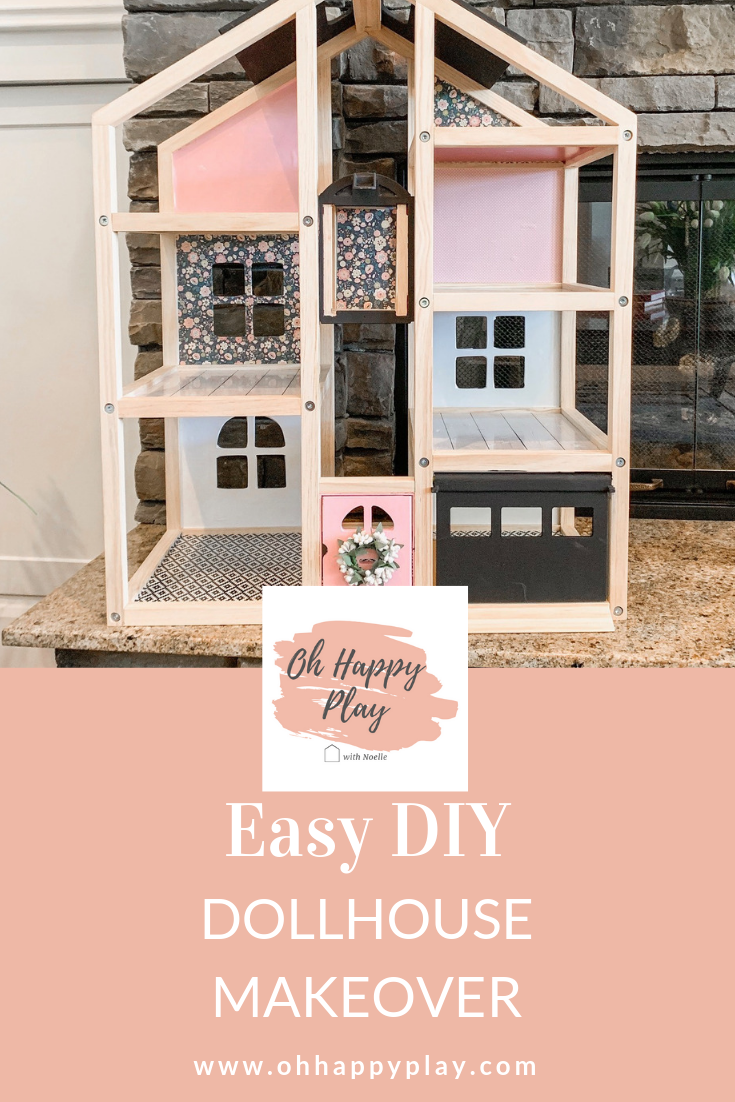
Easy DIY Dollhouse Makeover
This easy DIY dollhouse makeover is seriously one for the books. If you take one look at any of my kids’ interior spaces you’ll see that I tend to love a more modern look (and montessori living as well). Modern and children toys don’t usually mix so I find myself having to DIY a lot of their toys to accomplish the look I am going for. One DIY I have been so excited to do was the girls’ dollhouse. After it was all said and done it turned out to be a surprisingly easy DIY dollhouse makeover and I am excited to share it with you all!
Best Affordable Dollhouse For Toddlers:
I searched high and low when it came to finding the top dollhouse for my little girls and we even have tried a few. The best dollhouse I have found is this Melissa & Doug Hi-Rise Wooden Dollhouse. It checks all the boxes as to what I wanted in a dollhouse and comes with a set of furniture too!
Easy DIY Dollhouse Makeover How-To:
To get started with your modern dollhouse makeover, you’re going to need a few things.
Supply List for Your DIY Dollhouse Makeover:
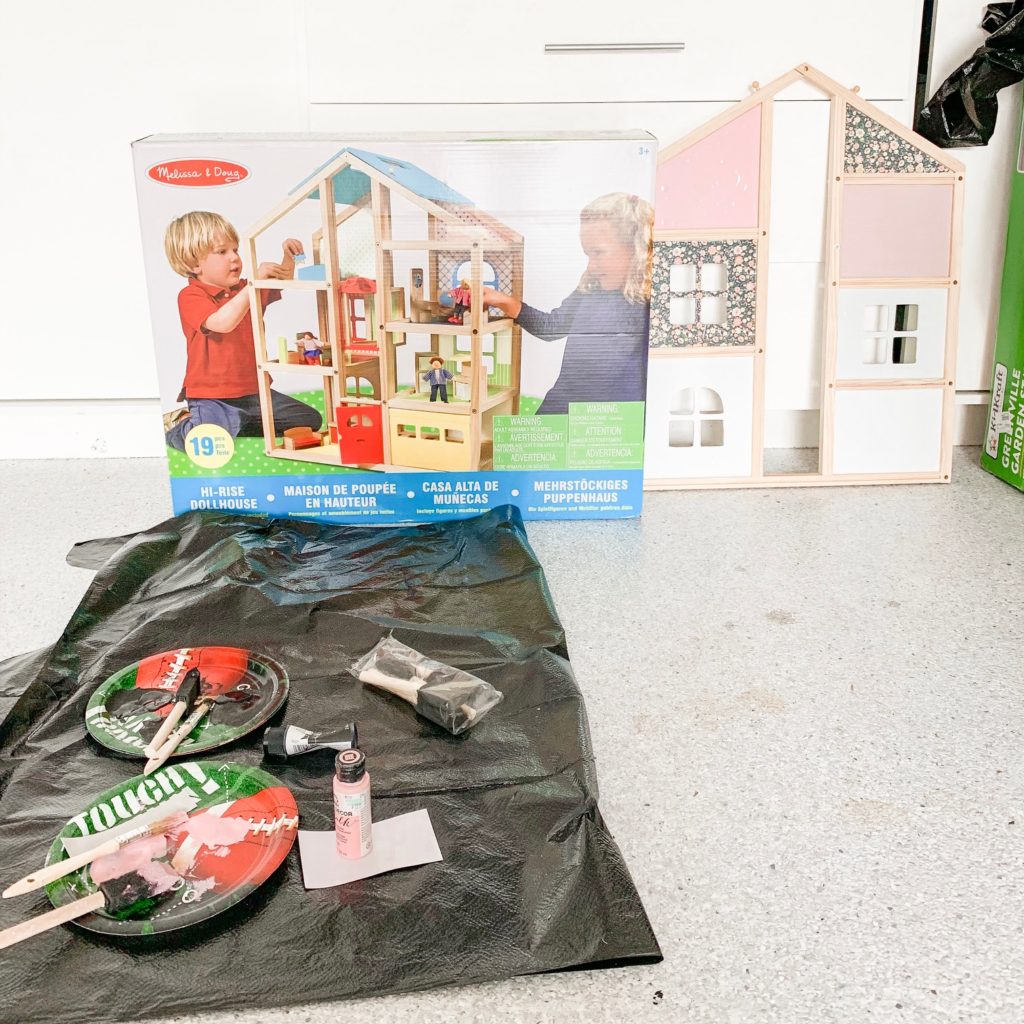
- Melissa & Doug Hi-Rise Wooden Dollhouse
-
Self-Adhesive Vinyl:I went to Hobby Lobby and found the vinyl you see used on my doll-house but if you want even more basic you can order self-adhesive vinyl right on Amazon!
- Paper Cutter: You’ll need this to cut the vinyl sheets to the sizes you need.
- Smoothing Tool & Exacto Cutter: This is CRUCIAL to getting the vinyl flat and without bubbles. Make sure you have this tool before you start! The exacto cutter is great for cutting out the windows after applying the vinyl.
- Chalk Paint: I used the FolkArt® Home Decor™ Chalk Paint, 2oz. from Hobby Lobby but also found it on Amazon if you don’t have a HL nearby! I used Black and Pink on ours!
Easy DIY Dollhouse Makeover Tutorial:
Once you have the supplies the rest is easy when it comes to creating this DIY modern dollhouse!
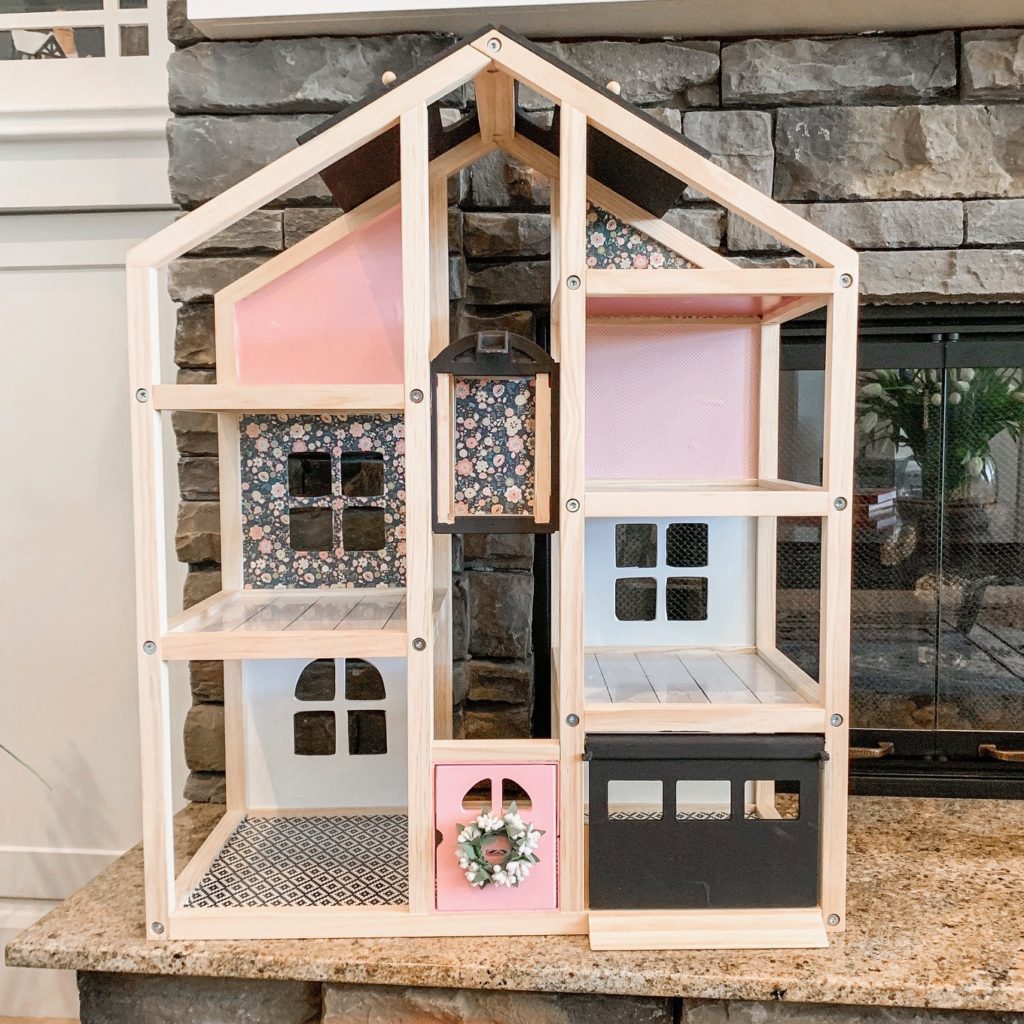
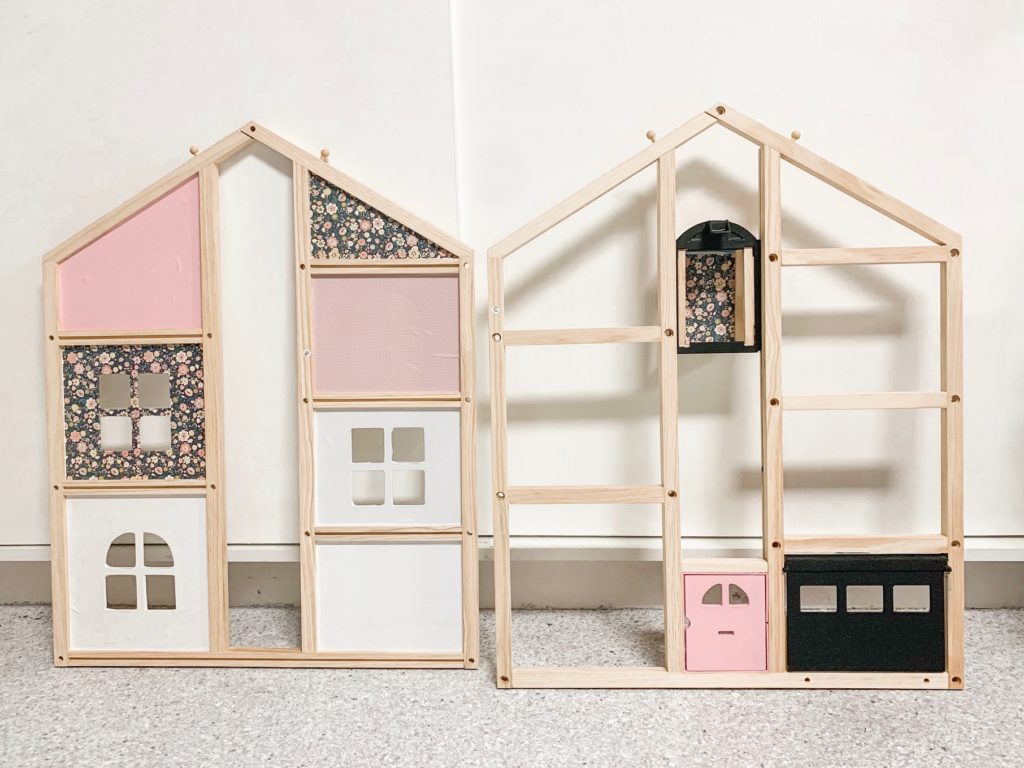
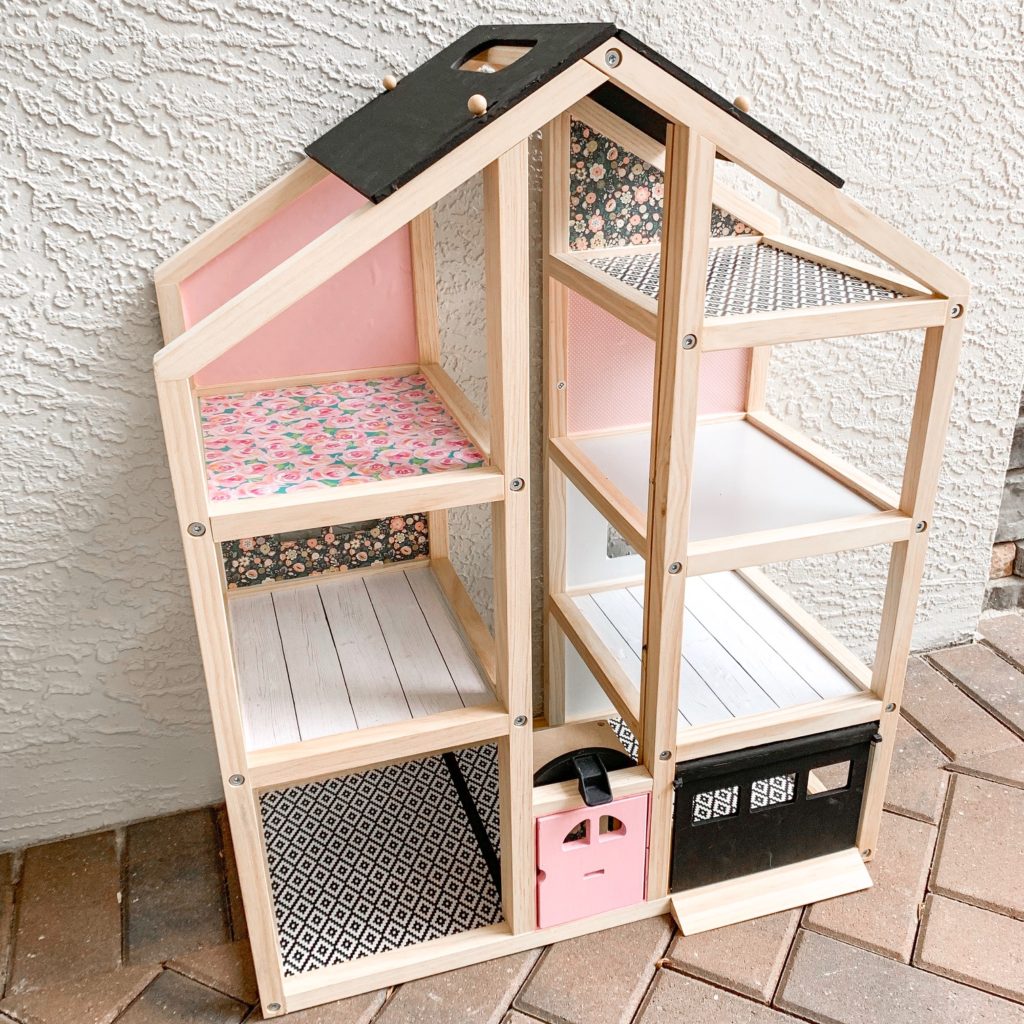
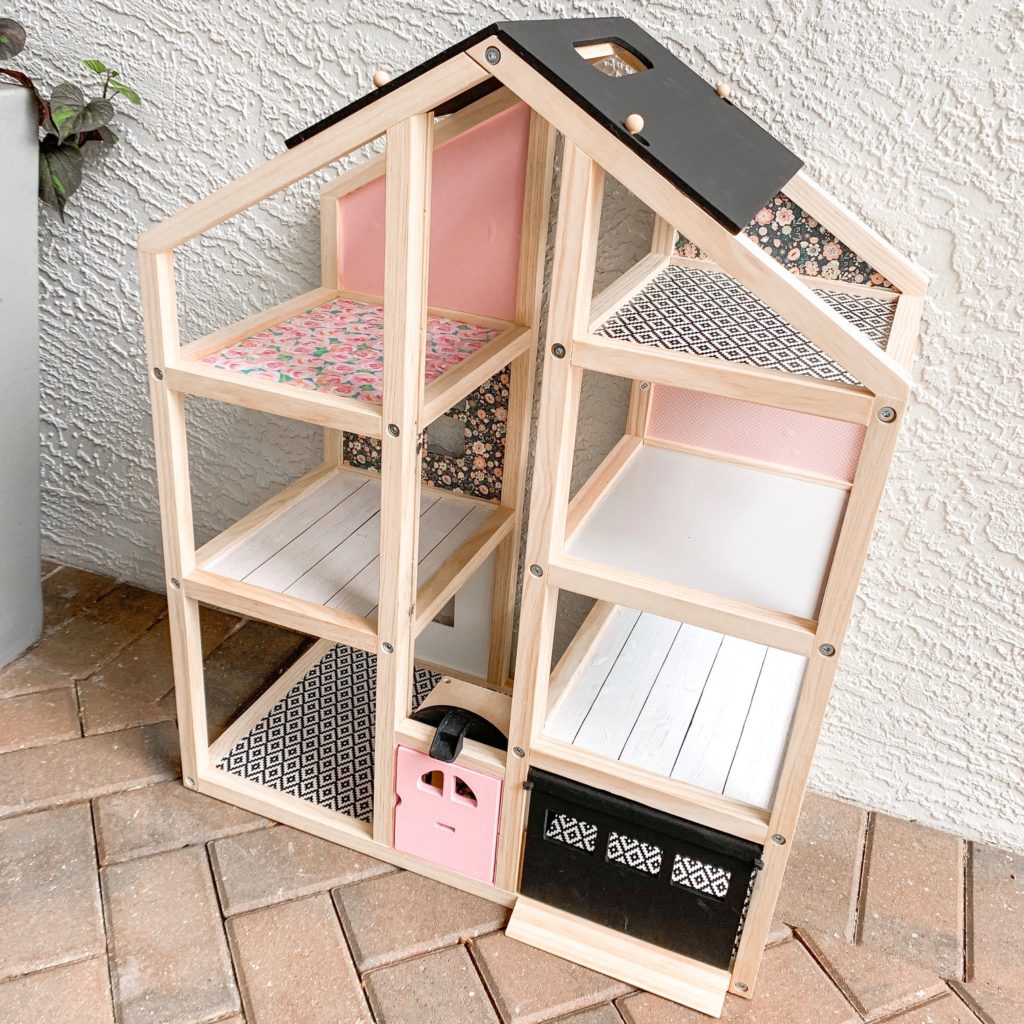
I started with the Melissa and Doug dollhouse disassembled and I applied the vinyl to the walls and floor (matching them up by using the instruction manual included). The walls with windows I just applied the vinyl as normal then cut out the windows with the exacto knife mentioned above. Painting was the trickiest part as you have to use painters tape around the wood area you don’t want painted as to not get any paint in that area. The garage and door do NOT come off so I suggest not trying to remove them. Use painters tape along the edges and give each surface at least 2 coats of paint to get the desired look.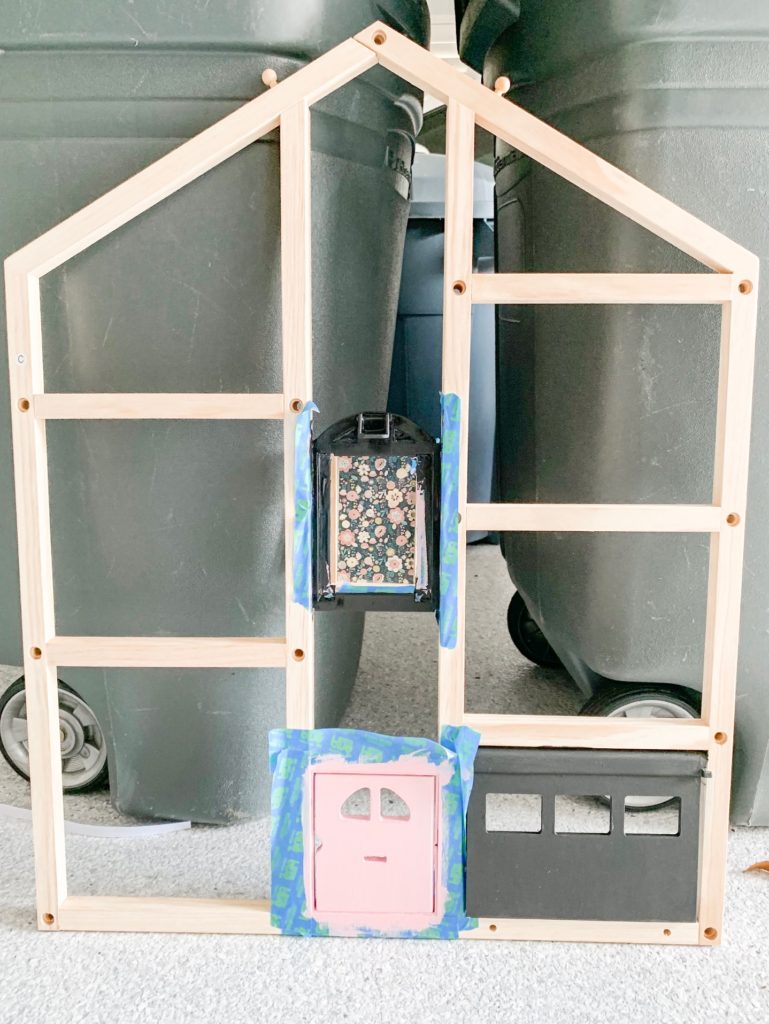
Here is the final product on my EASY DIY Dollhouse Makeover:
I hope you enjoy this as much as my girls and I enjoyed doing it! Pin my image below for future reference. Enjoy!
For more home diy projects for kids, check out the links below!
Surfer Themed Bedroom Idea With DIY Floor Bed For Toddler Boys
DIY House Frame Crib OR Toddler Bed
Organize Your Child’s Clothes With This Kid-Friendly DIY Kid Wardrobe Station
Make sure you follow along on social media for more fun design inspirations!


No Comments