Learn how to organize your pantry the right way with these amazing pantry organization tips that will leave you with a functional and useable pantry!
| This Post Contains Affiliate Links. This Means By Shopping Through My Links I Get A Small Commission (At No Cost To You!) For Bringing These Ideas To You! I Appreciate All Your Support!|
If there is one most used space in a family’s home it is often the kitchen. This is a space that the whole family uses and uses daily. For this reason alone the kitchen and pantry are the two areas that you can make the biggest impact in when beginning to organize your home. A streamlined and clutter free kitchen sets the tone for the entire house and I got to see this first hand when I had a local expert come to help me with ours! After tackling my pantry I am confident it should be where every family starts when they want to begin organizing their home. I am here to share some professional tips on pantry organization in 4 easy steps with expert Tampa Bay Organizer, Barbara Proia!
Advice for Hiring An Expert To Help Organize Your Home
While this is a project that you can certainly tackle on your own (and I am about to share with you how to tackle this seemingly large project!) I also can’t stress enough how helpful it was hiring an expert to help facilitate the process was for me. Sometimes the hardest part is just starting the project and a few feelings that I faced was:
- It’s overwhelming to start large projects
- Not knowing where to begin
- Not being able to finish and living in the clutter of it all
Having Barbara Proia of You Organized there to facilitate and lead the project is quite possibly the only way this would have ever been completed from start to finish. Not to mention as quickly as it did too! Barbara led the way and pushed through even with my 4 kids running around at our feet. If you are in the Tampa Bay area of Florida I HIGHLY suggest contacting Barbara to help you accomplish any organization goals you may have for your home!
Tampa Bay/ Pinellas County Organization Company
YOU Organized by Barbara Proia
[email protected] 727-424-8337
Follow me on Facebook at YOU Organized by Barbara Proia
DIY Pantry Organization
While I highly suggest hiring an expert to help, that isn’t always possible for some. For this reason I am sharing the exact process with the help of the expert, Barbara! This may seem long but I wanted to start by mentioning that I promise if you read this entirely BEFORE you start this project you will have a much higher success rate! You CAN do this! But read through ALL OF this first, ha!
Pantry Organization Goals
Ok ok, I know that means something else these days but listen up. There are ACTUAL GOALS here for organizing our pantries. With four kids in our home, my goal was to make the pantry as transparent as possible so the kids could get involved with choosing snacks as well as cooking and helping me find ingredients. The pantry/kitchen is a great place to teach kids to get involved in putting food away and helping. This is an area where you establish habits that will transfer to all areas of their life.
Pantry Fact: You only use what you can see. Organizing your pantry in such a way that allows you to see what you have and what you need to restock will help you save money and sanity when it comes to shopping and meal prep. No more “just in case” buying. You’ll know if you need to buy more sugar with a glance.
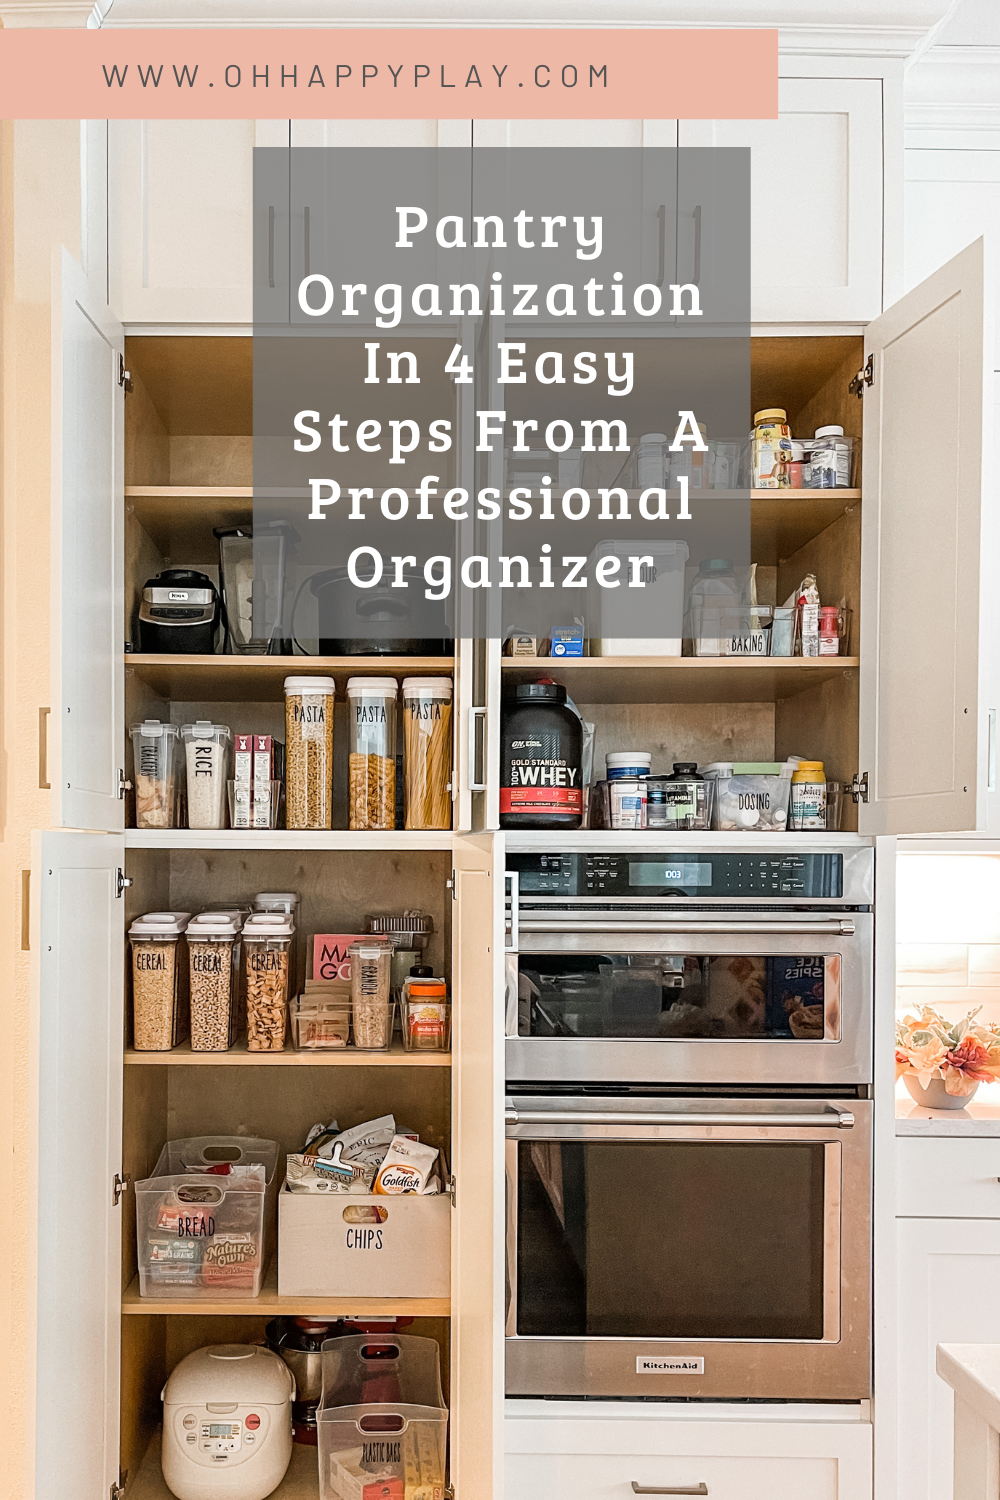
Pantry Organization In 4 Easy Steps
There are four core steps to organizing your pantry. They include:
- Taking everything out (emptying the pantry)
- Creating zones for each type of food
- Sorting the foods
- Selecting pantry bins for food storage
And from there you put all of the items in the select bins and tuck back into your pantry!
Here is a bit of a deeper dive into all of these steps for pantry organization.
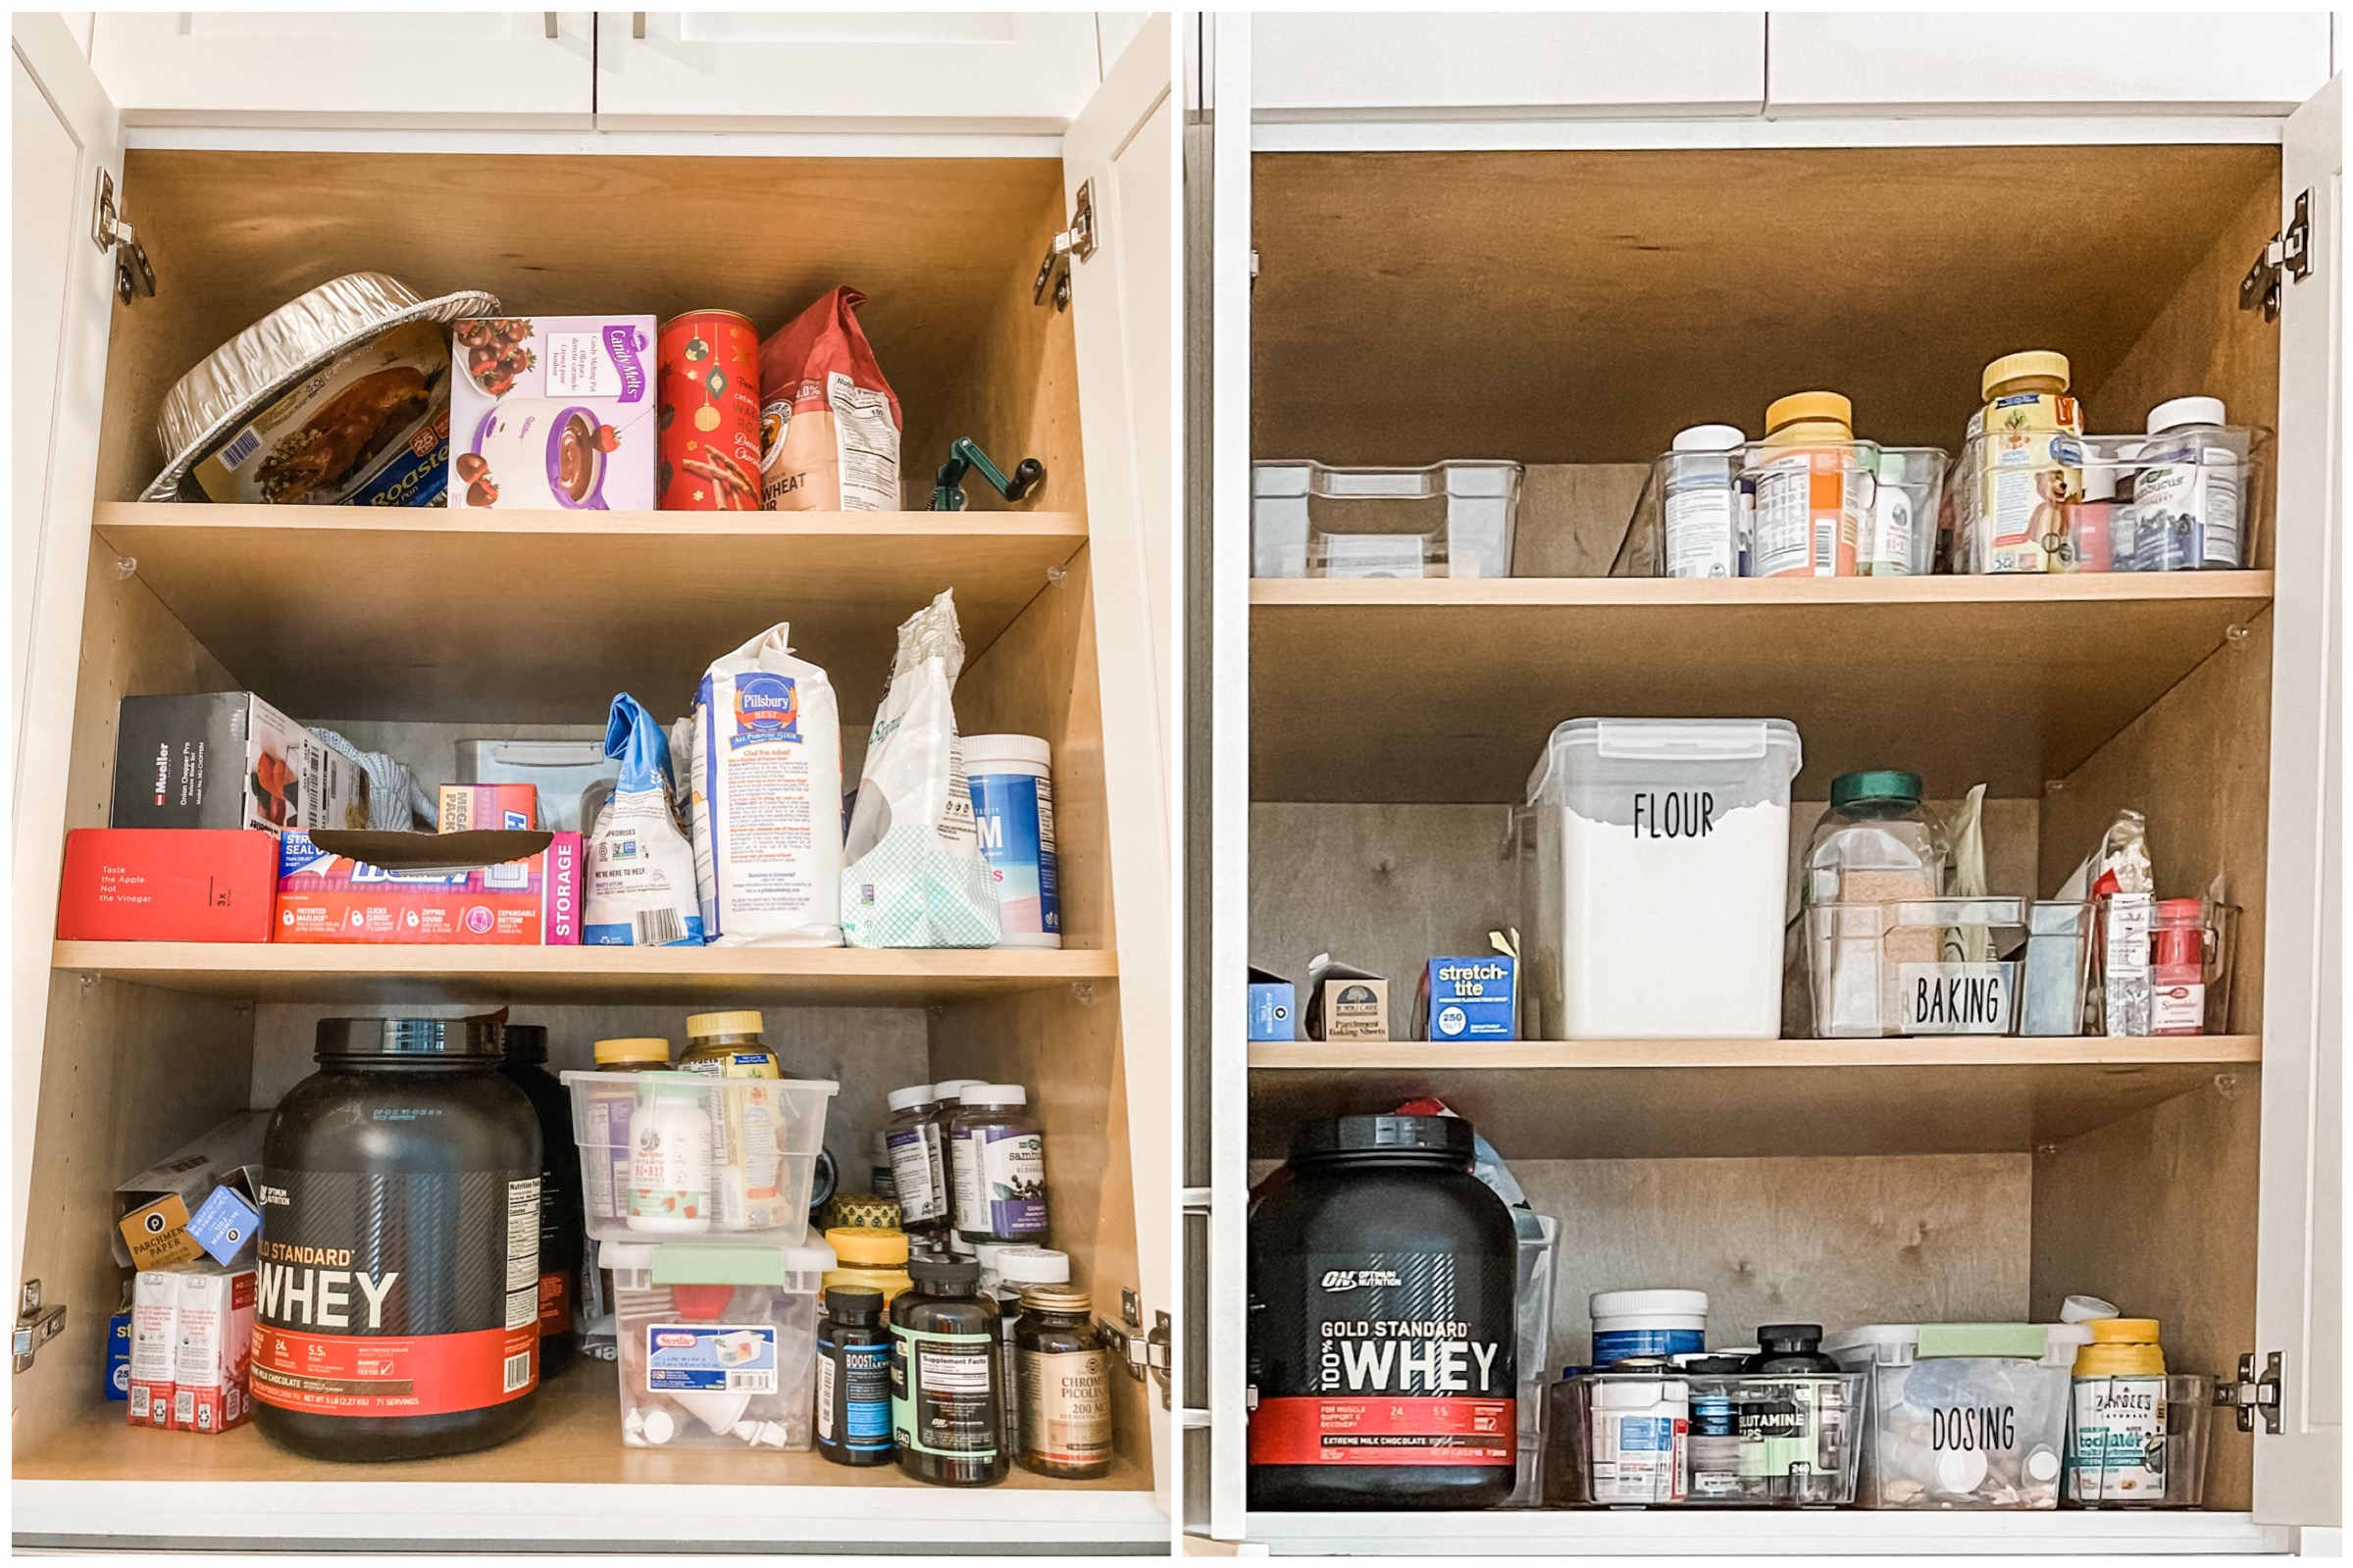
1: Take it all out!! Empty out your entire pantry.
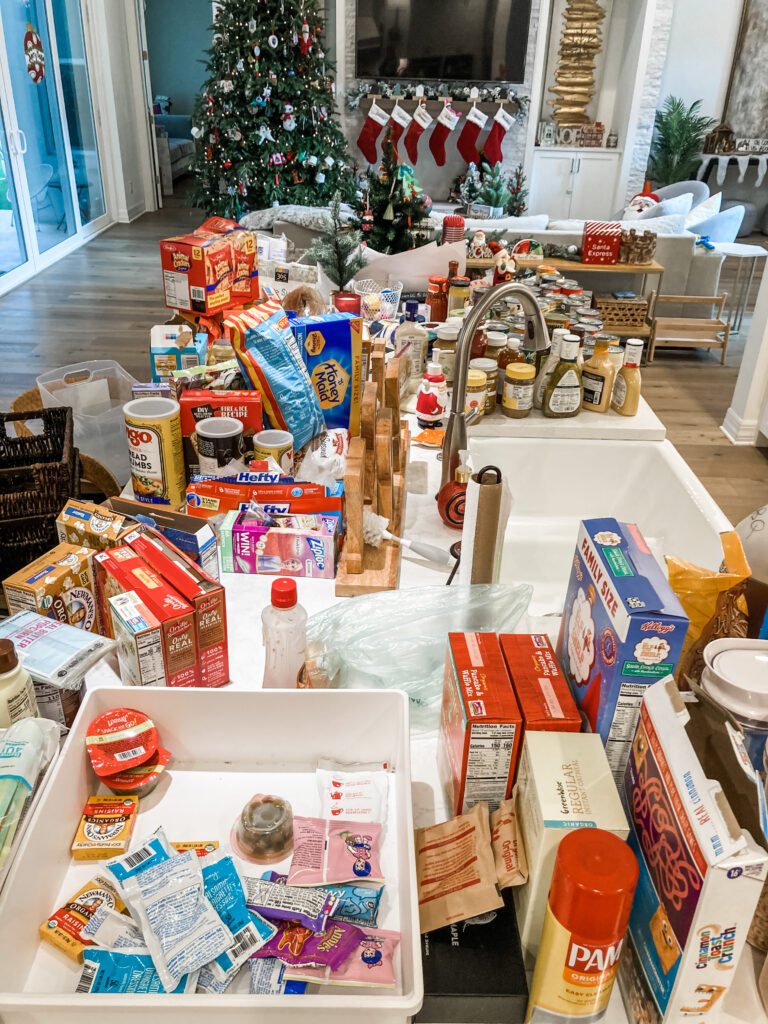
Yes, everything. TAKE IT ALL OUT. Just start emptying and putting everything on the kitchen island, table or a blanket on the floor. Leave your pantry bare! You can use this opportunity to give your shelves a nice wipe down too.
- Take note of trends you see as you are working through the pantry. Are you over-buying in some areas? Do the kids need easier access to lunch/school items? Does your family tend to drop and go in certain areas? How can you make it easier for them to put items back where they belong? What zones do you need closer to the kitchen work areas?
- TIP: If you notice you have 5 bottles of vitamins that you have on auto-ship, cancel or even pause the subscription until you use those you currently have. The amount of money you save doing this could potentially pay for this entire project alone!
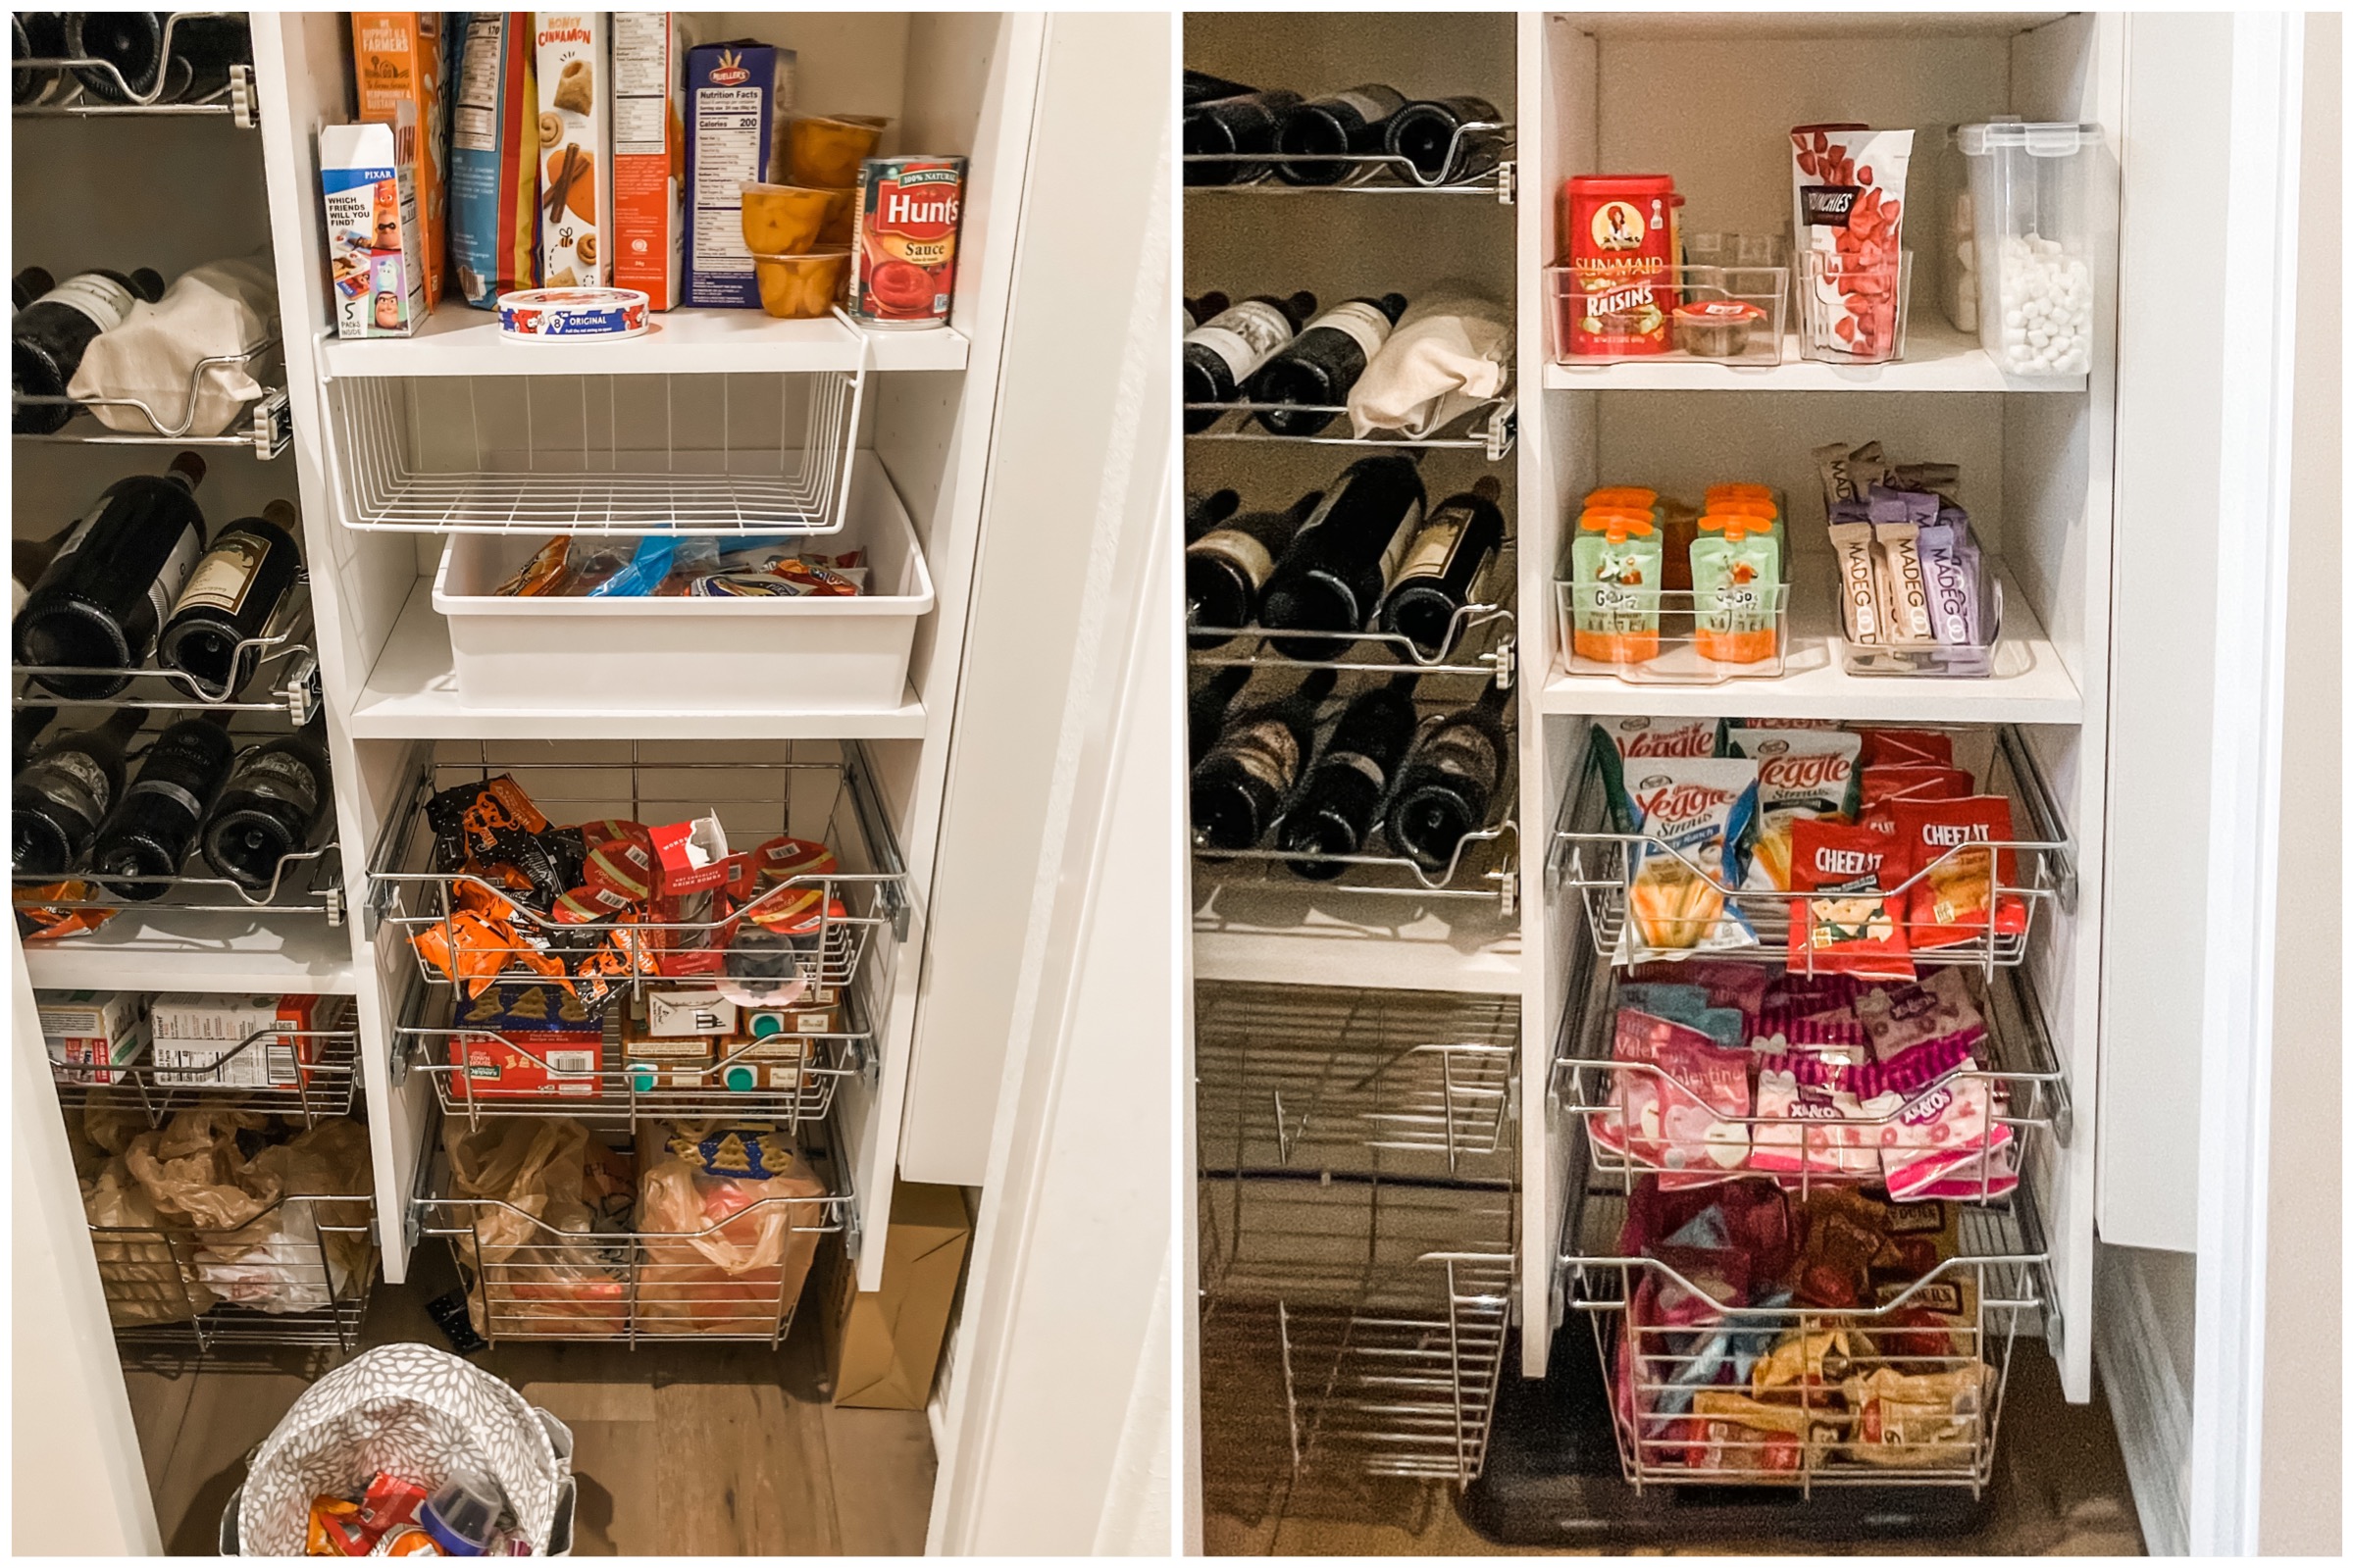
2: Create Zones For Food Items
Just as a grocery store has a baking aisle, your pantry should have key zones for items your family uses on a daily basis. Identify KEY ZONES that work for your family, such as:
- A Breakfast Zone
- Supplements & Shakes
- Kids’ Snacks
- Baking
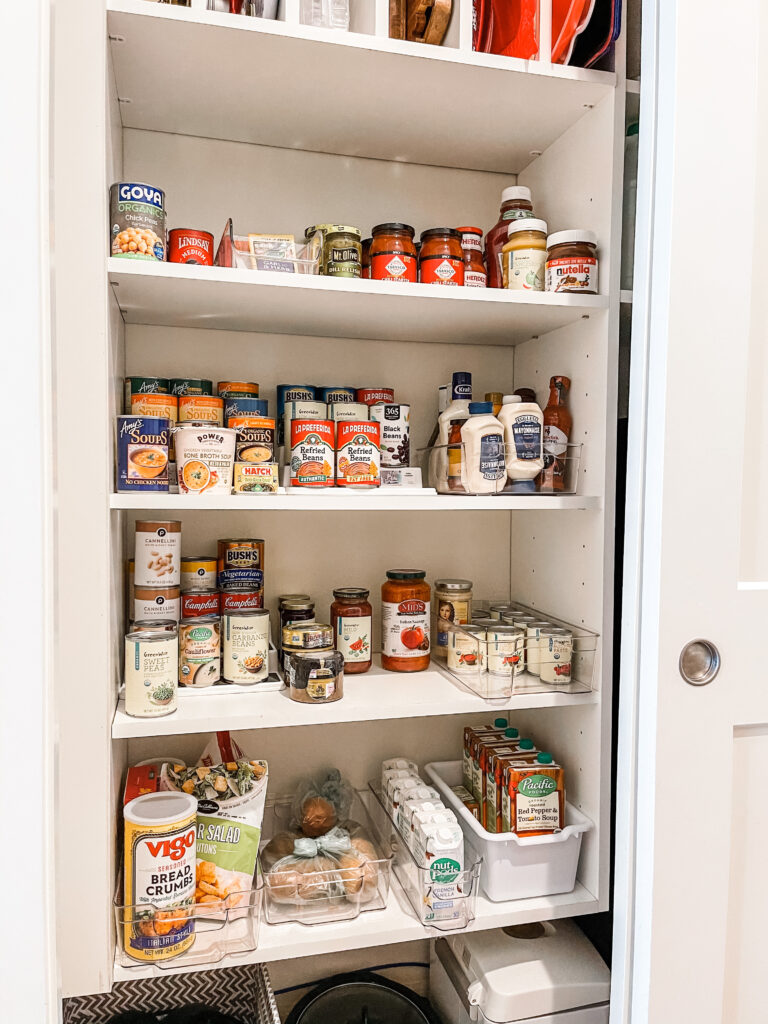
- Canned/Jarred Goods
- Pasta/Rice
- Chips/Bread
Once you have the zones determined, then you can determine where the right placement for each one is.
3: Sort Contents
After everything is out of the pantry you can sort contents by type of food or what the item is used for (Ex: Baking.) Gather like items together, such as pasta & rice, oils & sauces, canned & jar goods, snack foods, etc. and put them together as you build “categories” for your pantry. These categories will then fit into your key zones.
As you begin to sort the contents that are now all over your kitchen here are some tips:
TIP: Use sticky notes to plan out the shelf space/Category then ultimately the zone!
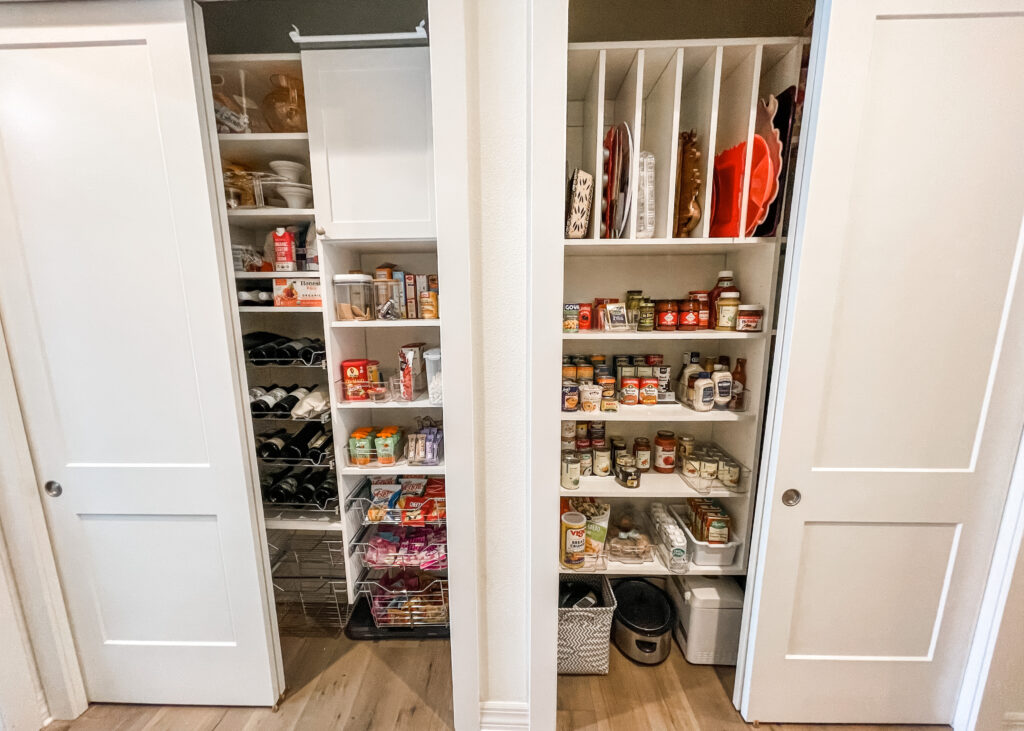
- Infrequently used items & appliances can go up high
- Mid-section for every-day use
- Are your mornings busy? Create a morning zone that is closest to the kitchen with the easiest access (ours is in a kitchen cabinet instead of our designated pantry space)
- Floor baskets or bins can work for back stock (Back stock are the items you have that you do go through more quickly or picked up as a BOGO for example.) I also use a floor basket for my InstaPot as it doesn’t fit on my shelves.
- What items do you want close to kitchen work areas? Baking and cooking items often are better placed in an easy to access cabinet.
Once you sort the contents of your pantry:
Review each category and match it with a zone. Toss out all expired items or things you won’t use, such as the crackers you tried but the kids didn’t like. Also toss/donate items given to you that you won’t use. You’re not obligated to keep anything given to you.
TIP: Do you have 12 boxes of pasta? Consider donating excess non-perishable goods that are low cost to replace.
NOTE: You should not have bought any products yet! The KEY here is waiting to see what you have first so you aren’t wasting time and MONEY on products that wont fit or that you don’t need.
4: Select Pantry Bins
Select the storage products based on zones and needs. Plan to decant as many items as possible so purchase storage accordingly.
Pantry Tips:
- Decanting is key – emptying the cereal, snack packs, bars, etc. into clear bins helps you manage the supply and also makes it easy for littles to grab & go. (How many times have you picked up an empty box in the pantry?)
- Decant cereal, baking, bulk items, pasta & rice into air tight containers – it is cleaner, stays fresher longer, easy to see quantity and generally easier to use. It may feel like an extra step after the grocery store but this goes a long way when it comes to function.
- Label as many bins and containers as you can! Labels are like a library system for organization. They give everything a home, and tell others where to find & replace items. I must say I wasn’t sure this step was needed but after we labeled everything (using a Circut) it was SUCH a difference! NOW I label everything! Don’t have a Cricut, I use this label maker at home which would work as well (you can buy clear tape!)
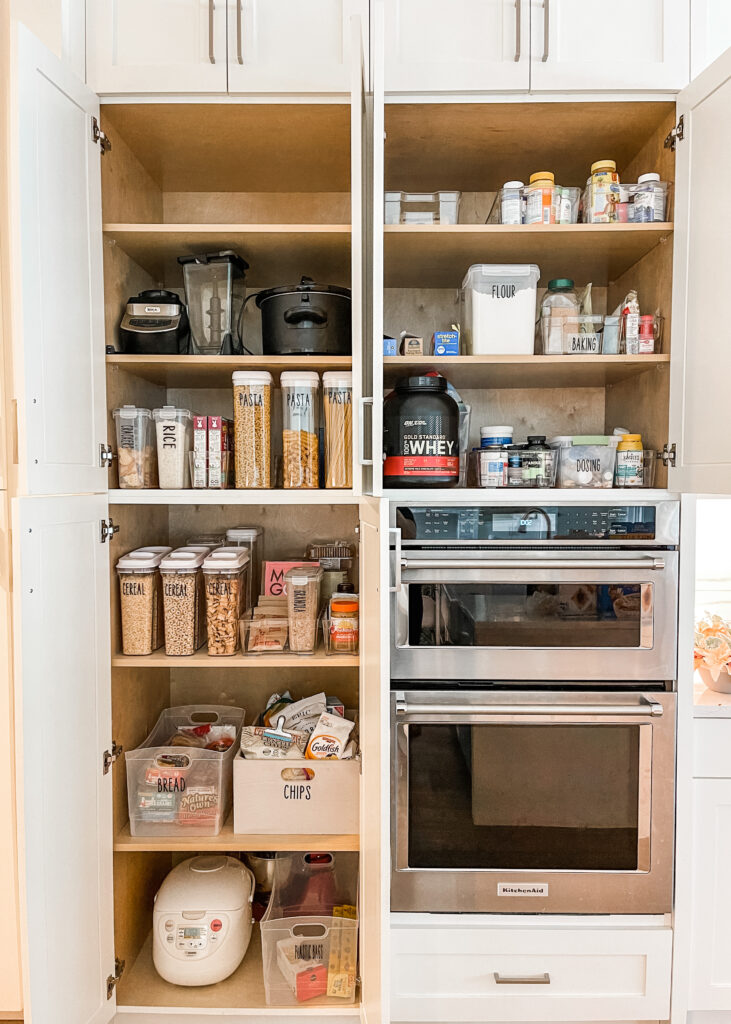
Pantry Organizer Bins Make A Big Impact

Kids Pantry Side
|Looking for more kid specific organization around the house? Check out my popular, ‘Organize Your Child’s Clothes With This DIY Wardrobe Station’ post!|
Some items to consider for your pantry when it comes to bins: (links to what I used below!)
- Turntables are excellent for oils, sauces, vinegars
- Packet caddies work well in pantries
- Airtight bins/jars/dispensers for cereal, grains, baking
- Clear bins of different sizes, depending on items to contain
- Larger Baskets for floors – use this for overflow items or even cooking appliances like your InstaPot.
Pantry Organizer Bins
Below are the pantry organization bins we used for our pantry!
- OXO Good Grips Airtight POP Large Cereal Dispenser (these are the best for cereals and super easy for kids to use!)
It is important to note that you can organize your pantry with inexpensive items that you already have, from a local big box store or even dollar store. You don’t need to purchase costly containers to have an organized pantry. It’s not the container that organizes you, it’s the system you put in place. Start with what you have and slowly replace bins/baskets as you can to get a uniform look.
FREE Pantry Organization Task List + Key Zone Suggestion List:
Pantry Organization FREE Download
I hope this post helps you on your pantry organization journey! With the help of Barabara Proia of YOU Organized (the organization expert of the Tampa Bay area!) Remember, be realistic. Your pantry may not be Pinterest post worthy, but it doesn’t matter if it works for you.
Make sure you follow along on social media for more!
If you like what you see please consider pinning on Pinterest or sharing with friends!


No Comments